


Colour Wiring Diagram
I recently posted an updated wiring diagram for the Norton Electra – taking the factory standard drawing, colorizing it and making the layout of the components simpler to follow on paper.
The drawing was a faithful reproduction of the original, and contained no alterations or aftermarket upgrades.
It can be found here
Charging System ‘Upgrade’
A very popular upgrade for the Norton Electra is to fit a single phase Lucas alternator stator, and aftermarket combined regulator/rectifier.
This is an “A REG ONE” unit from Al Osborn at AO Services.
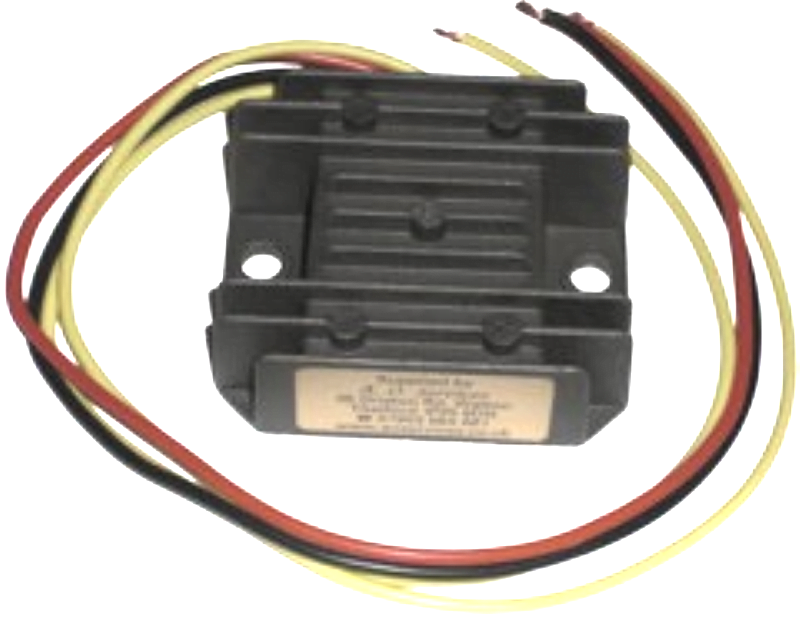
Al Osborne is the Norton Owners Club “Electrical Technical Advisor” – I am calling out Al over and above others in this article, as he is a Norton Lightweight Twin owner himself, and is a wealth of useful information and a big contributor to the community.
The installation instructions for fitting the “A REG ONE” can be found here

Wiring Diagram
Below is a simplified wiring diagram that incorporates the aftermarket regulator/rectifier.
Two things to note:
- I have wired the reg/rec in so that the ammeter shows charge/discharge – many people will just wire the reg/rec directly to the positive and negative terminals of the battery.
That’s fine, but it means the ammeter won’t swing to show the affect of the alternator. - I have added a separate fuse on the reg/rec output – this is, at least in my eyes, best practice.
If there is an issue with the alternator stator or the reg/rec you have fuse protection, yet still stand a decent chance of getting home.
Again, others will choose not to do this.
Here is the wiring diagram.
Norton Electra 400cc twin from Feb 1963 wiring diagram with aftermarket regulator/rectifier PNG 3066 x 1841
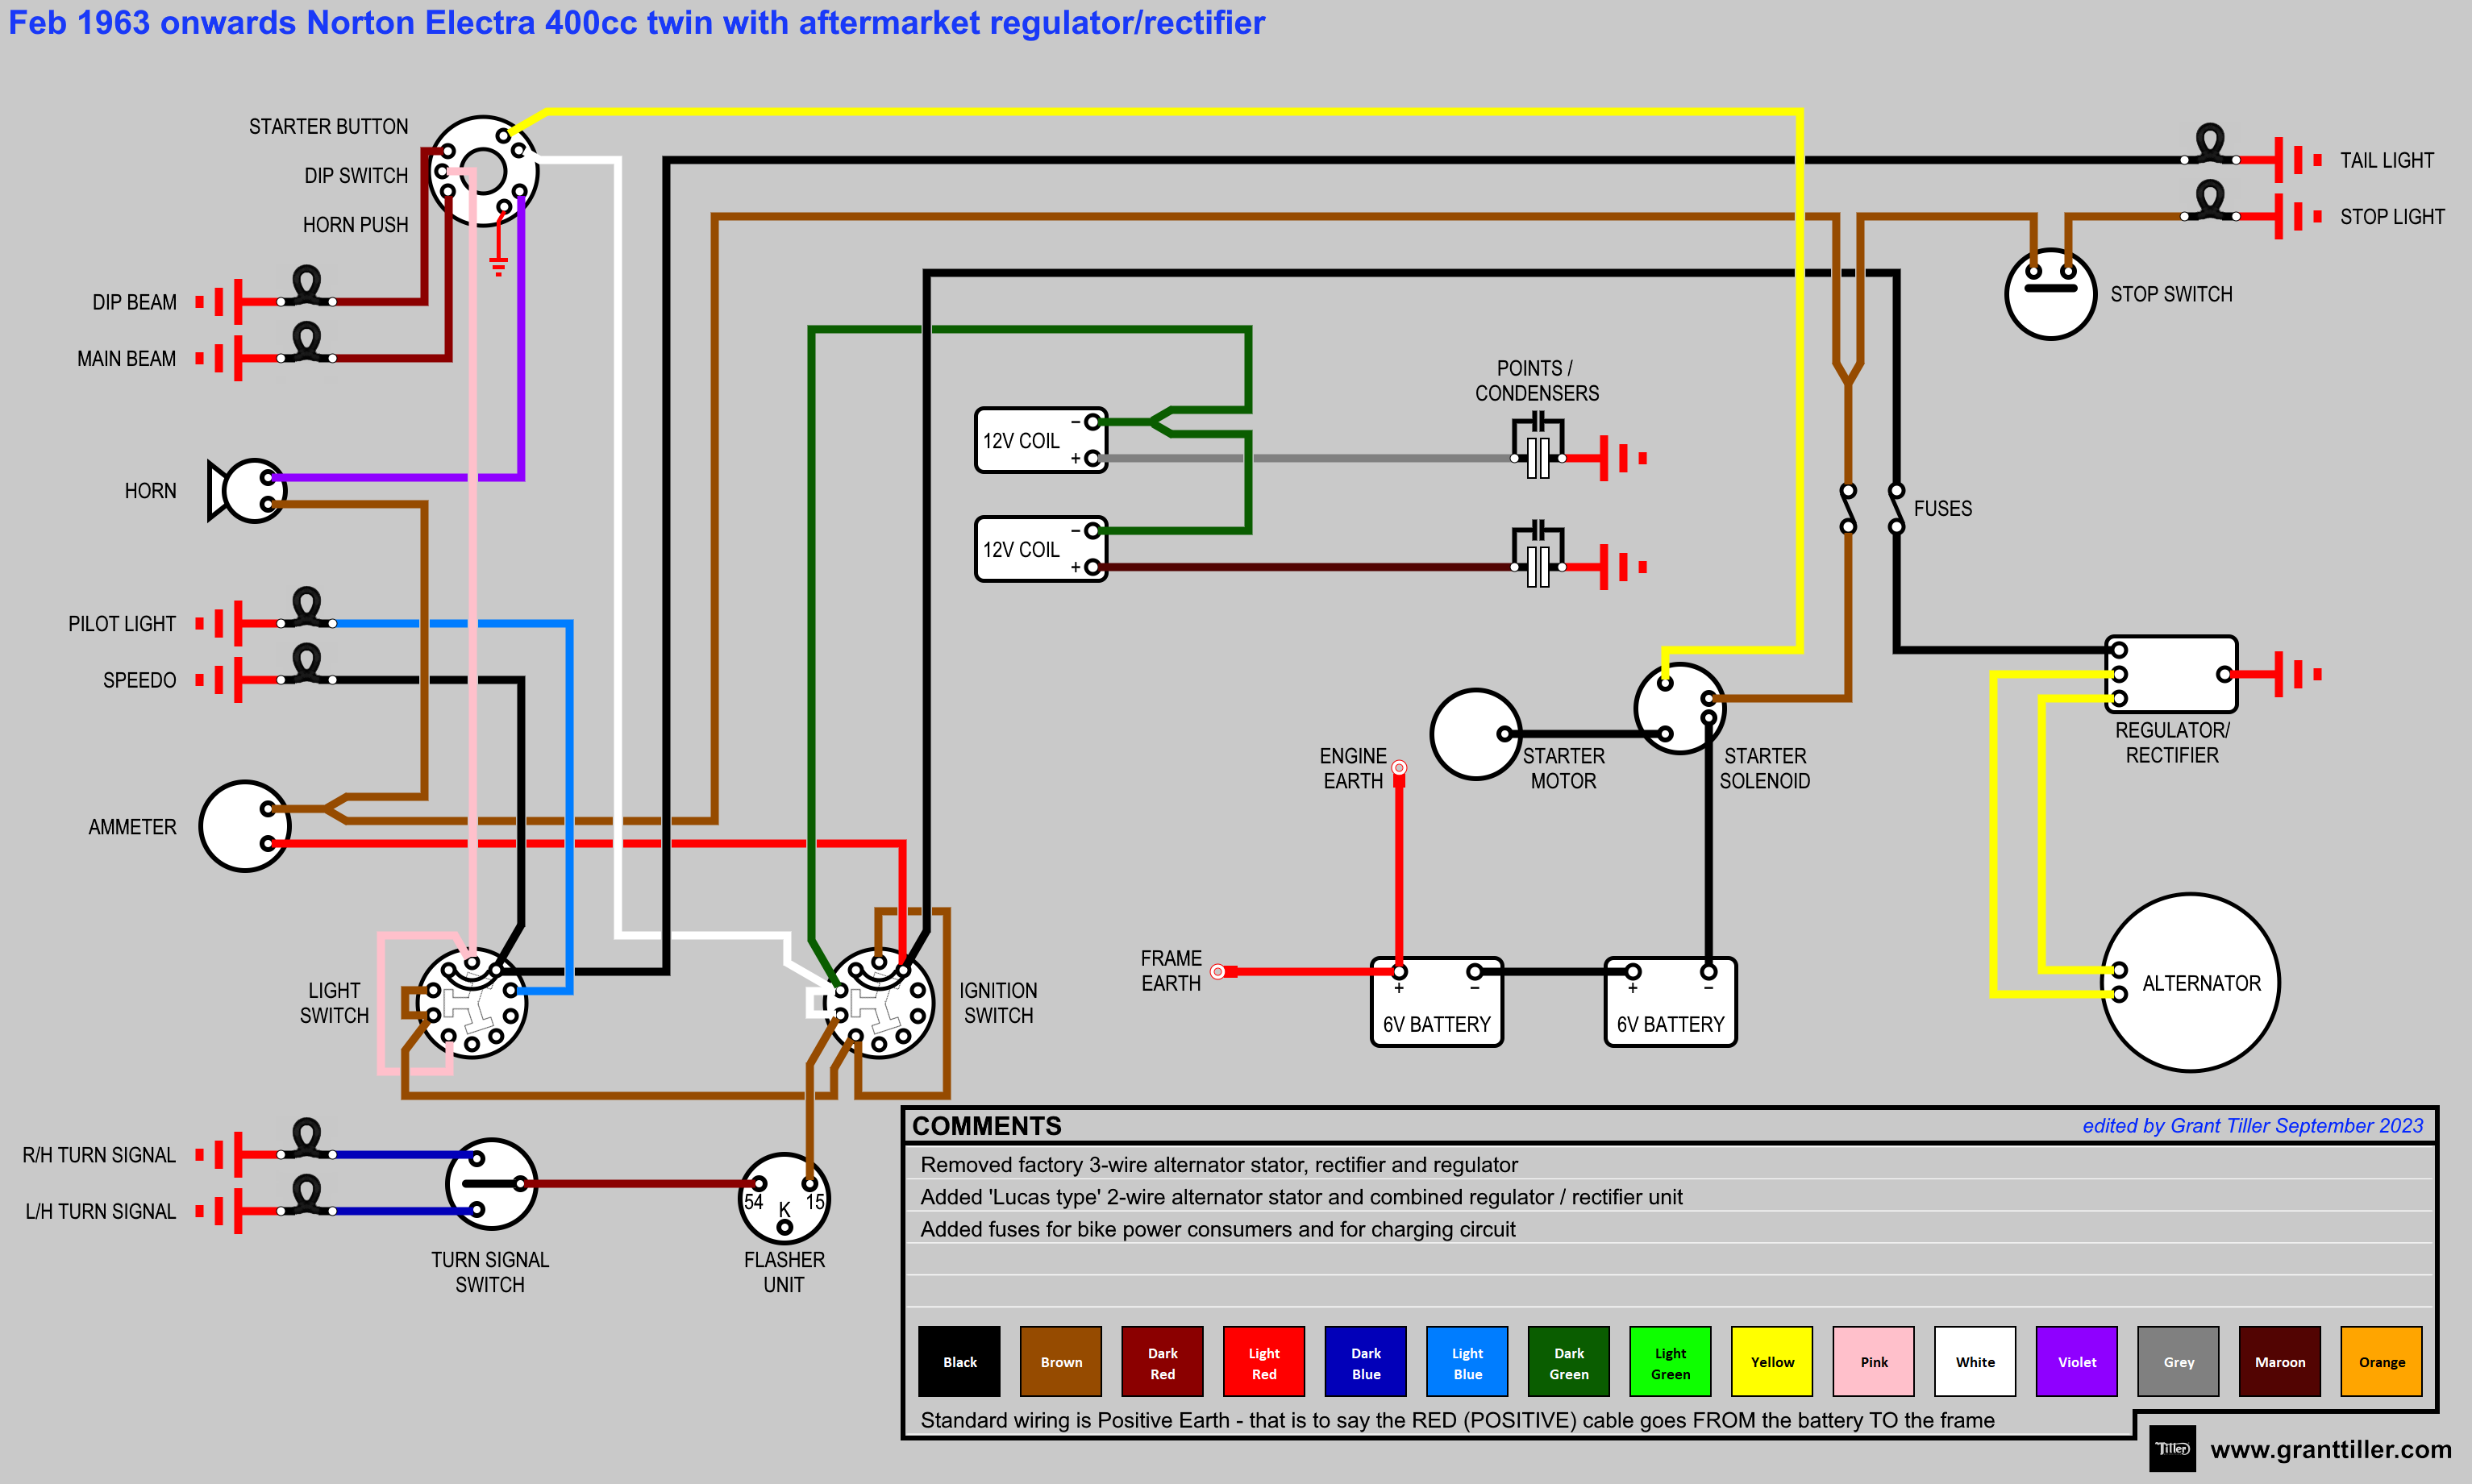
This is available as a PDF too – it can be downloaded here.
Wipac ‘vs’ Norton
Norton made a minor change between the schematic that Wipac created originally and published, and the version that Norton later published in their factory workshop manual.
The change is pertaining to the behaviour of the lighting – in the “emergency” ignition switch position, the lighting is not operable based on the original Wipac schematic.
However, with the Norton’s later revision, the lighting behaves the same in both normal “ignition” and “emergency” switch positions.
I assume this change was due to the need or desire to get home safely under the cover of darkness with lights on!

Norton Electra 400cc twin from Feb 1963 (updated) wiring diagram PNG 3066 x 1841
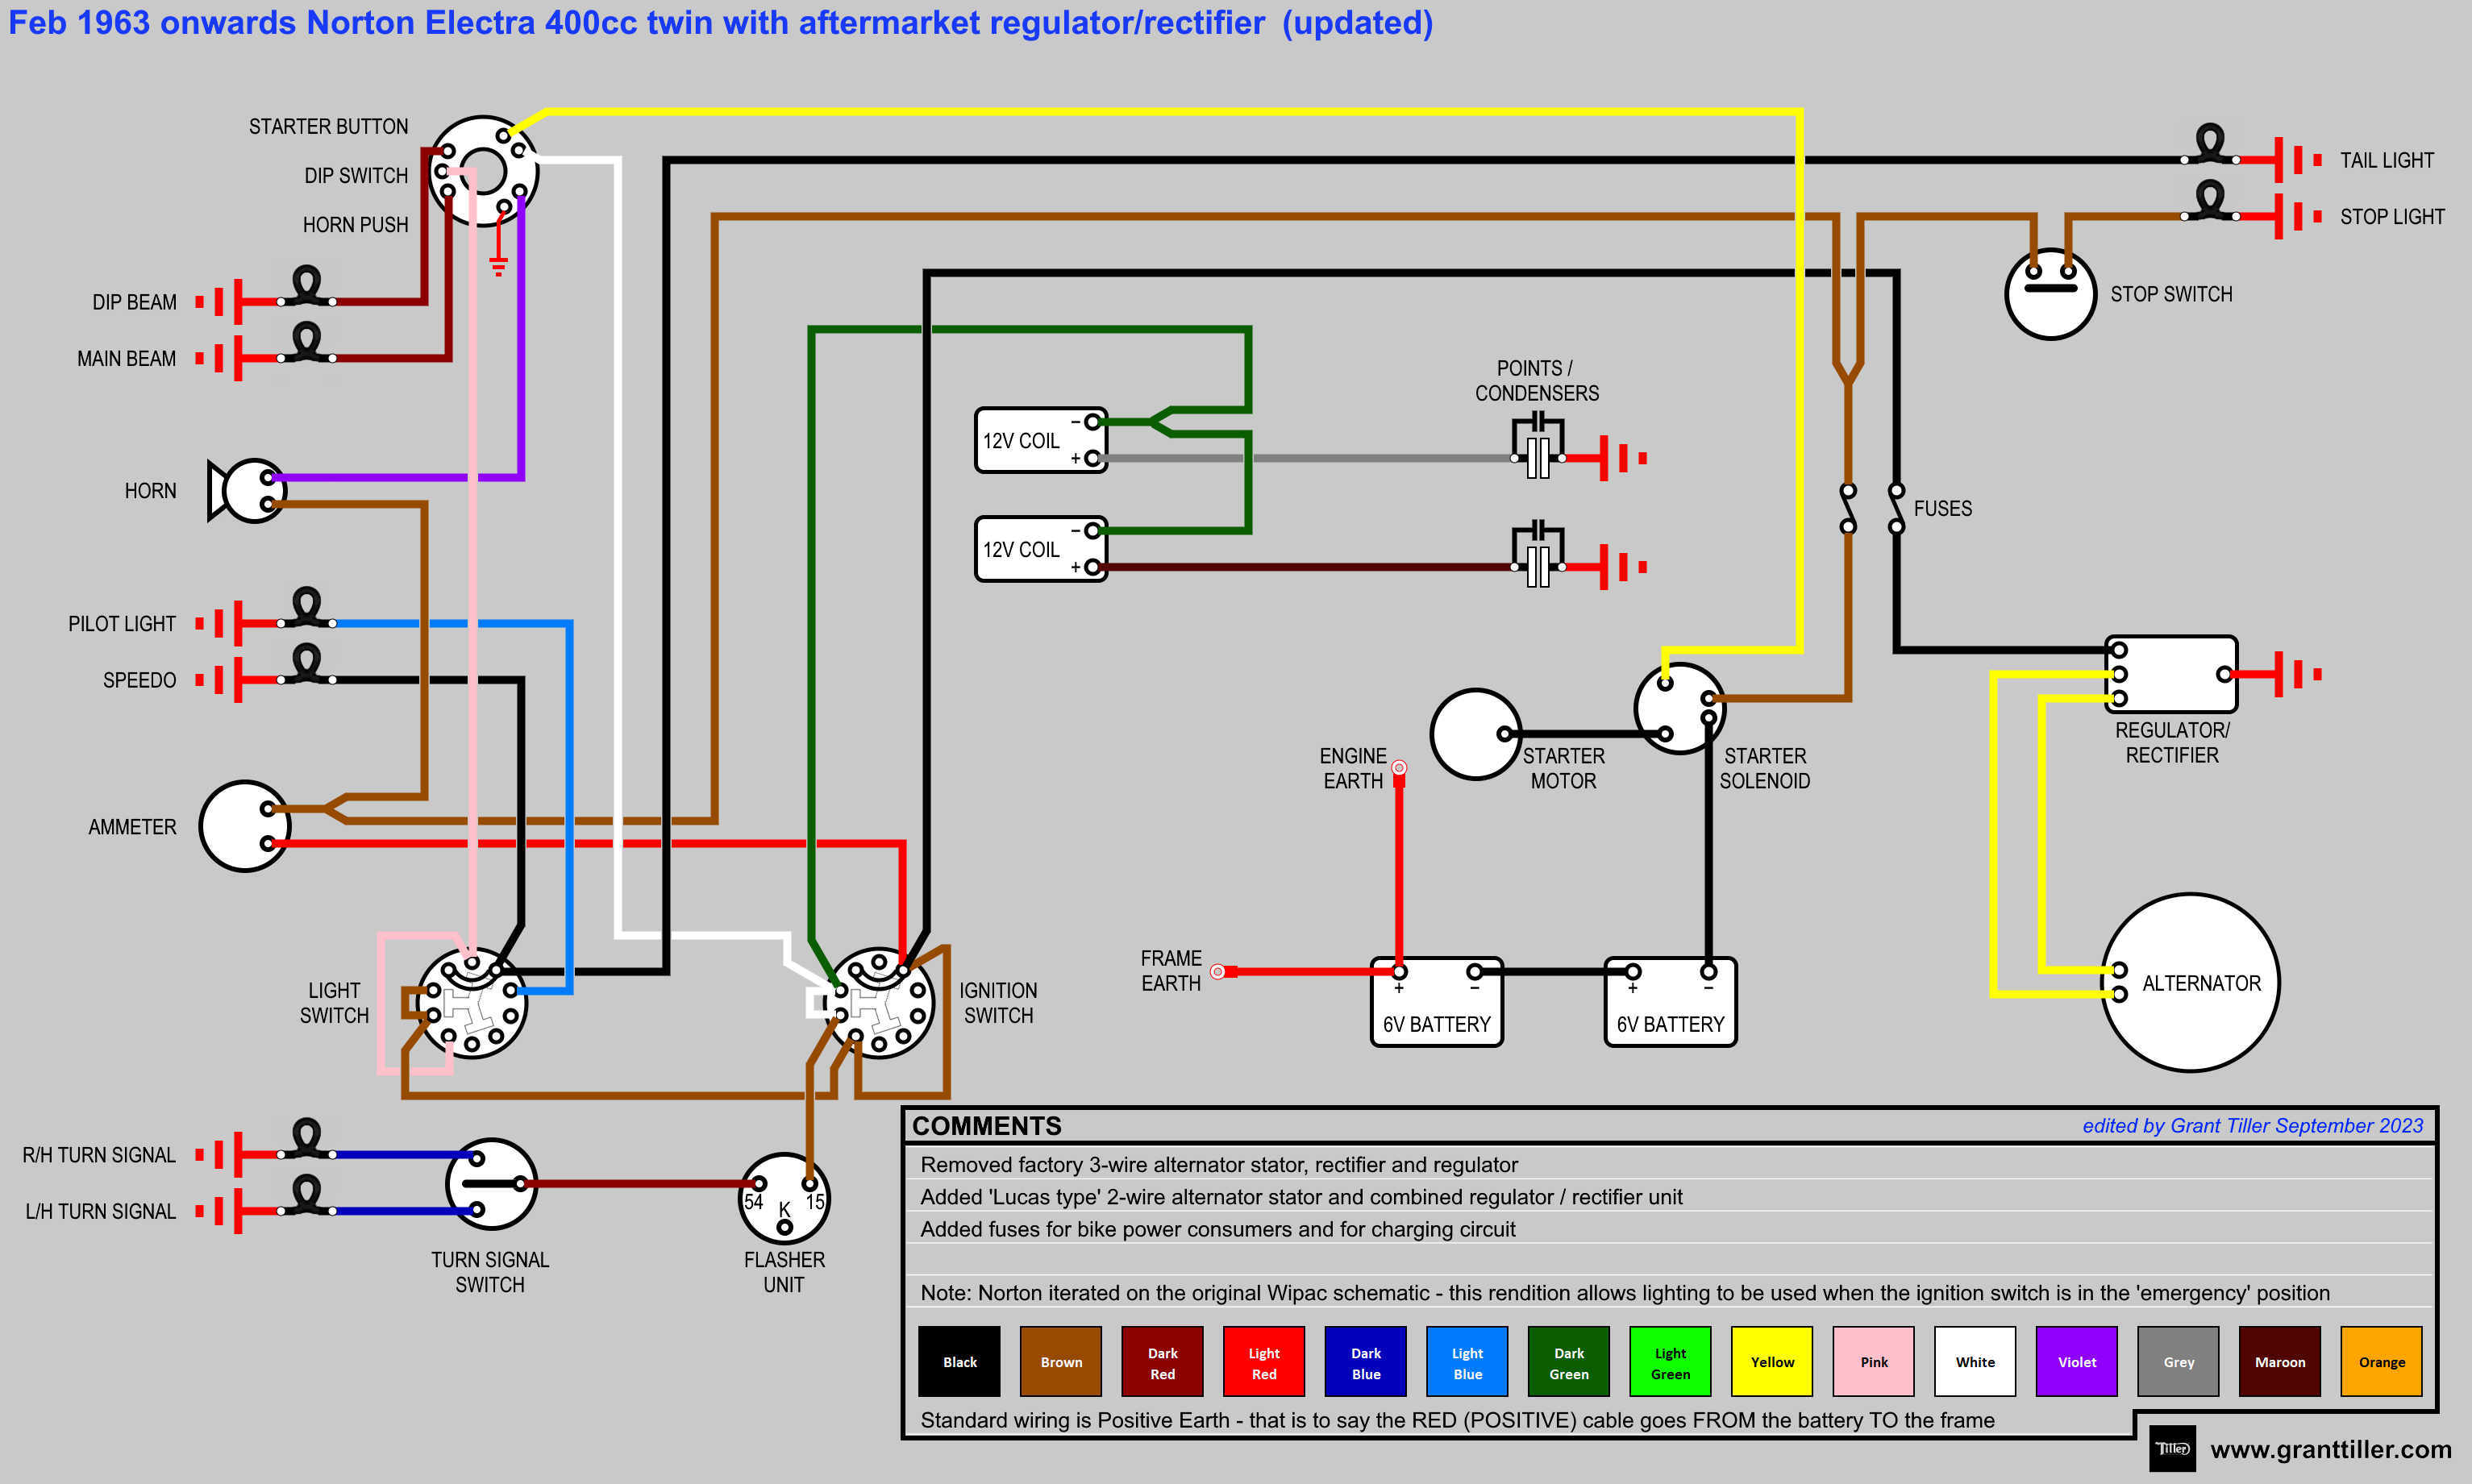
This is available as a PDF too – it can be downloaded here.