


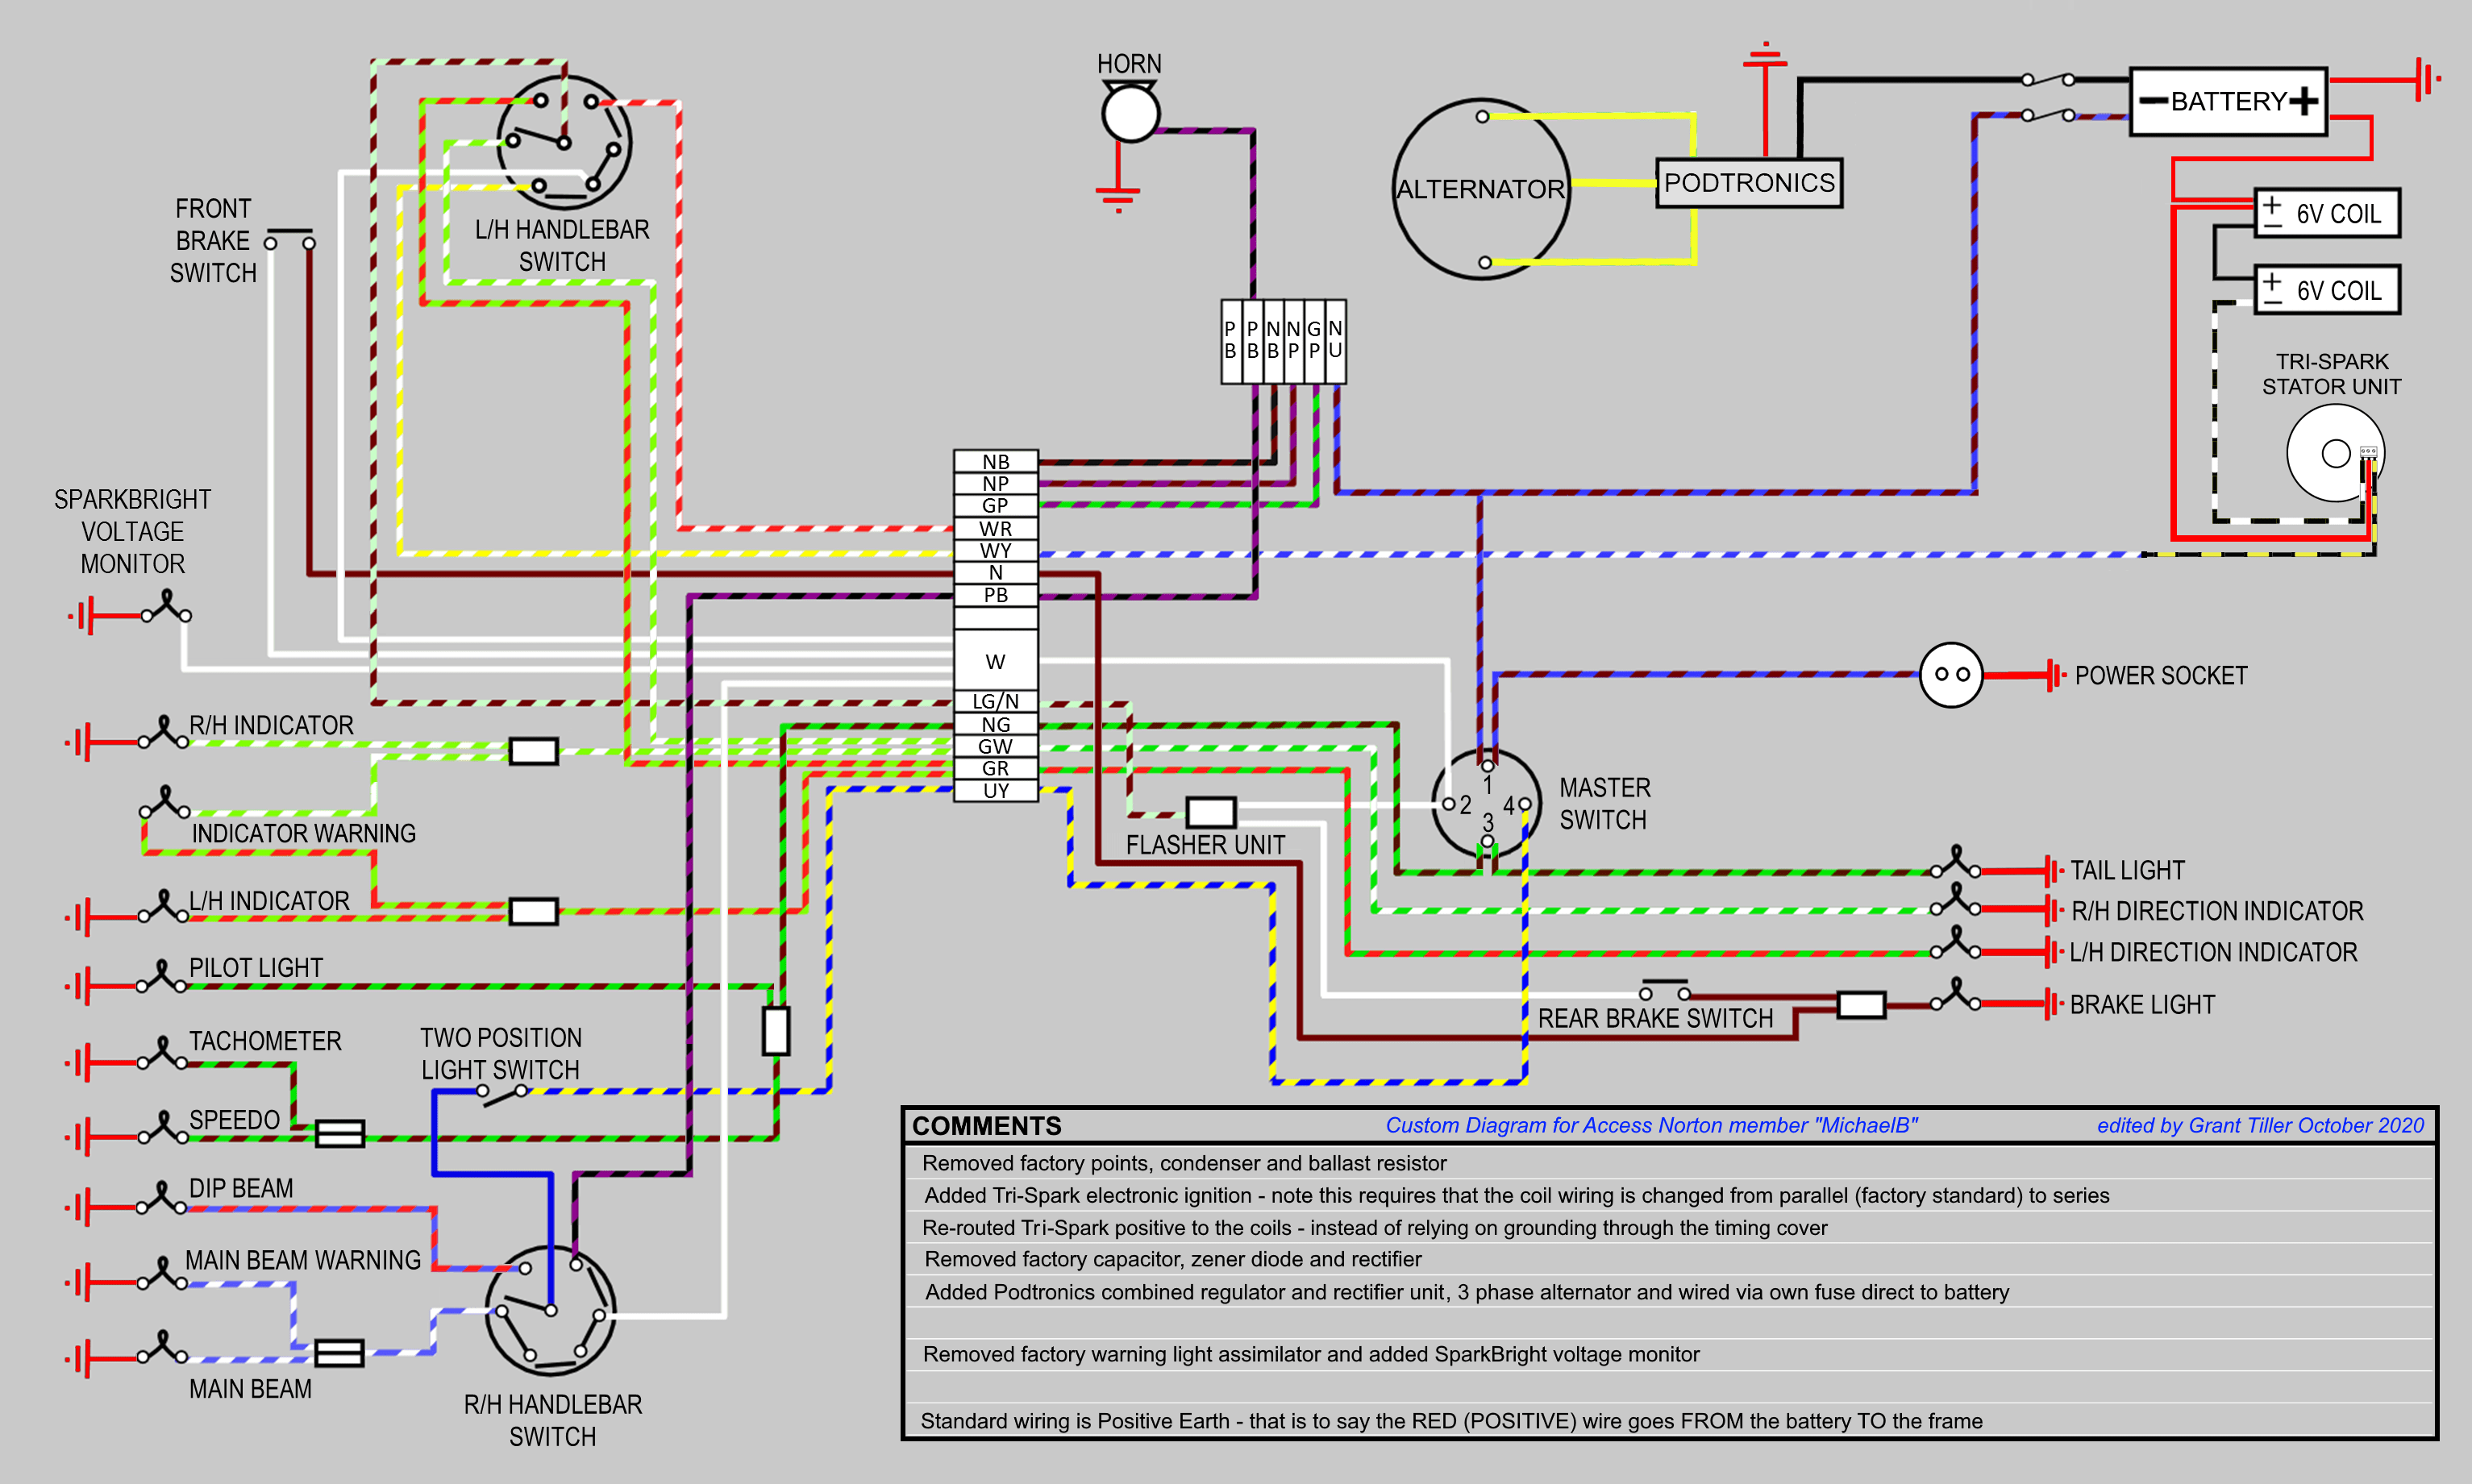
This is a custom wiring diagram for MichaelB from the Access Norton Forum
Electronic Ignition
Michael has fitted a Tri-Spark electronic ignition to his bike.
You can find the Tri-Spark website here.

The Tri-Spark unit is a one box solution – all the gubbins are mounted inside the points cover – no additional black box to try and hide under the tank, and very very simple to connect up.
The wiring is as follows:
- Red wire – this is the positive feed to the Tri-Spark unit. Most people attach this wire to one of the two fixing posts inside the points cover. I would personally recommend running an additional wire up to the coils and have drawn the wiring diagrams accordingly.
- Black/Yellow – this is the negative feed to the Tri-Spark unit. This joins in to the White/Blue wire that used to feed the Ballast Resistor that you are removing. As standard, this goes up to the big connector block under the tank, where it’s joined to the White/Yellow that is the kill switch on your left side handlebar switch cluster.
- Black/White – this is the negative supply FROM the Tri-Spark TO the coils.
As with the Boyer, from a wiring perspective, the most important thing to note is that you will be moving from a pair of coils that are wired in parallel to series.
Originally, the points make and break the positive (earth) side of each coil in turn.
The Tri-Spark electronic ignition system uses a concept called “wasted spark” – with the two coils wired in series, they are energized together on every rotation of the camshaft.
You’ll note in the wiring diagrams below that the Ballast Resistor and Condensers have been removed as part of the conversion to Electronic Ignition.
One major benefit of the Tri-Spark is the very low operating voltage – as low as 8 volts means your bike will still run with a less than optimal battery and charging system. Smart circuitry performs the electronic equivalent of advance and retard to make the bike easier to start and stop the possibility of kick-back.
Regulator/Rectifier
He’s also fitted a 3 phase alternator with a Podtronics regulator/rectifier.
I like the fact he has wired this directly to the battery and has it on it’s own fuse – this is good practice, and if there is a fault with the charging system, you stand a chance of being able to ride home on battery power!
One of the most common upgrades or modifications for a classic british bike is to add a combined regulator/rectifier unit.
Our Commandos use a blue can capacitor, zener diode (which can be found mounted on the back of the z-plate) and rectifier unit.
A combined regulator/rectifier replaces all of these components with one package.
The most common manufacturer of these is Podtronics.

There are four wires to connect:
- Two Yellows – these are the AC input and pick up on the Green/Yellow and Green/White (connection can be any way round, as this is the AC side of the circuit)
- The Red – this is the Positive output and will join to the red wire if you are using existing wiring (it goes straight to the ground/earth of the frame)
- The Black – this is the Negative output (known as the hot wire) – it will pick up on the Brown/Blue wire (which goes via a fuse straight to the battery negative terminal)
Charge Warning Light

Michael has also fitted a SparkBright voltage monitor in lieu of the unreliable warning light assimilator.
Wiring Diagram
Custom Norton Commando Wiring Diagram – MichaelB PNG 3066×1841
Hi Grant,
A friend is setting up his Norton the same as mine, a 1974 Mk2. We both desire a custom harness. It has the Trispark ignition and 3 phase regulator, turn signals, capacitor removed, replacing the assimilator with an Improvingclassicmotorcycles unit, heated grips, no kill switch. I’m sure I missed something. It seems that the wiring diagram for Mike Yingling comes closest. What would you charge for creating a custom diagram for these bikes?
Also, what sort of connectors do you use, or do you prefer the original bullet type? Thanks
PG
Hi Peter,
I’d be pleased to take a look.
Are you looking to build a harness from scratch, or modify an off the shelf one?
Also, what is the make and model of the heated grips you have?
Hi Peter,
I have put together a wiring diagram for you as requested.
I think I have all the points covered that you asked me to consider.
The diagram can be found here:
https://granttiller.com/peter-gallant
Take care,
Grant