This is Stevan Thomas – he is the author of the article “The World’s Straightest Commando“

It’s a good read, and if you have your Commando stripped to the bare frame, it’s well worth following Stevan’s pointers on making sure your bike is straight and true.
You can access the article here:

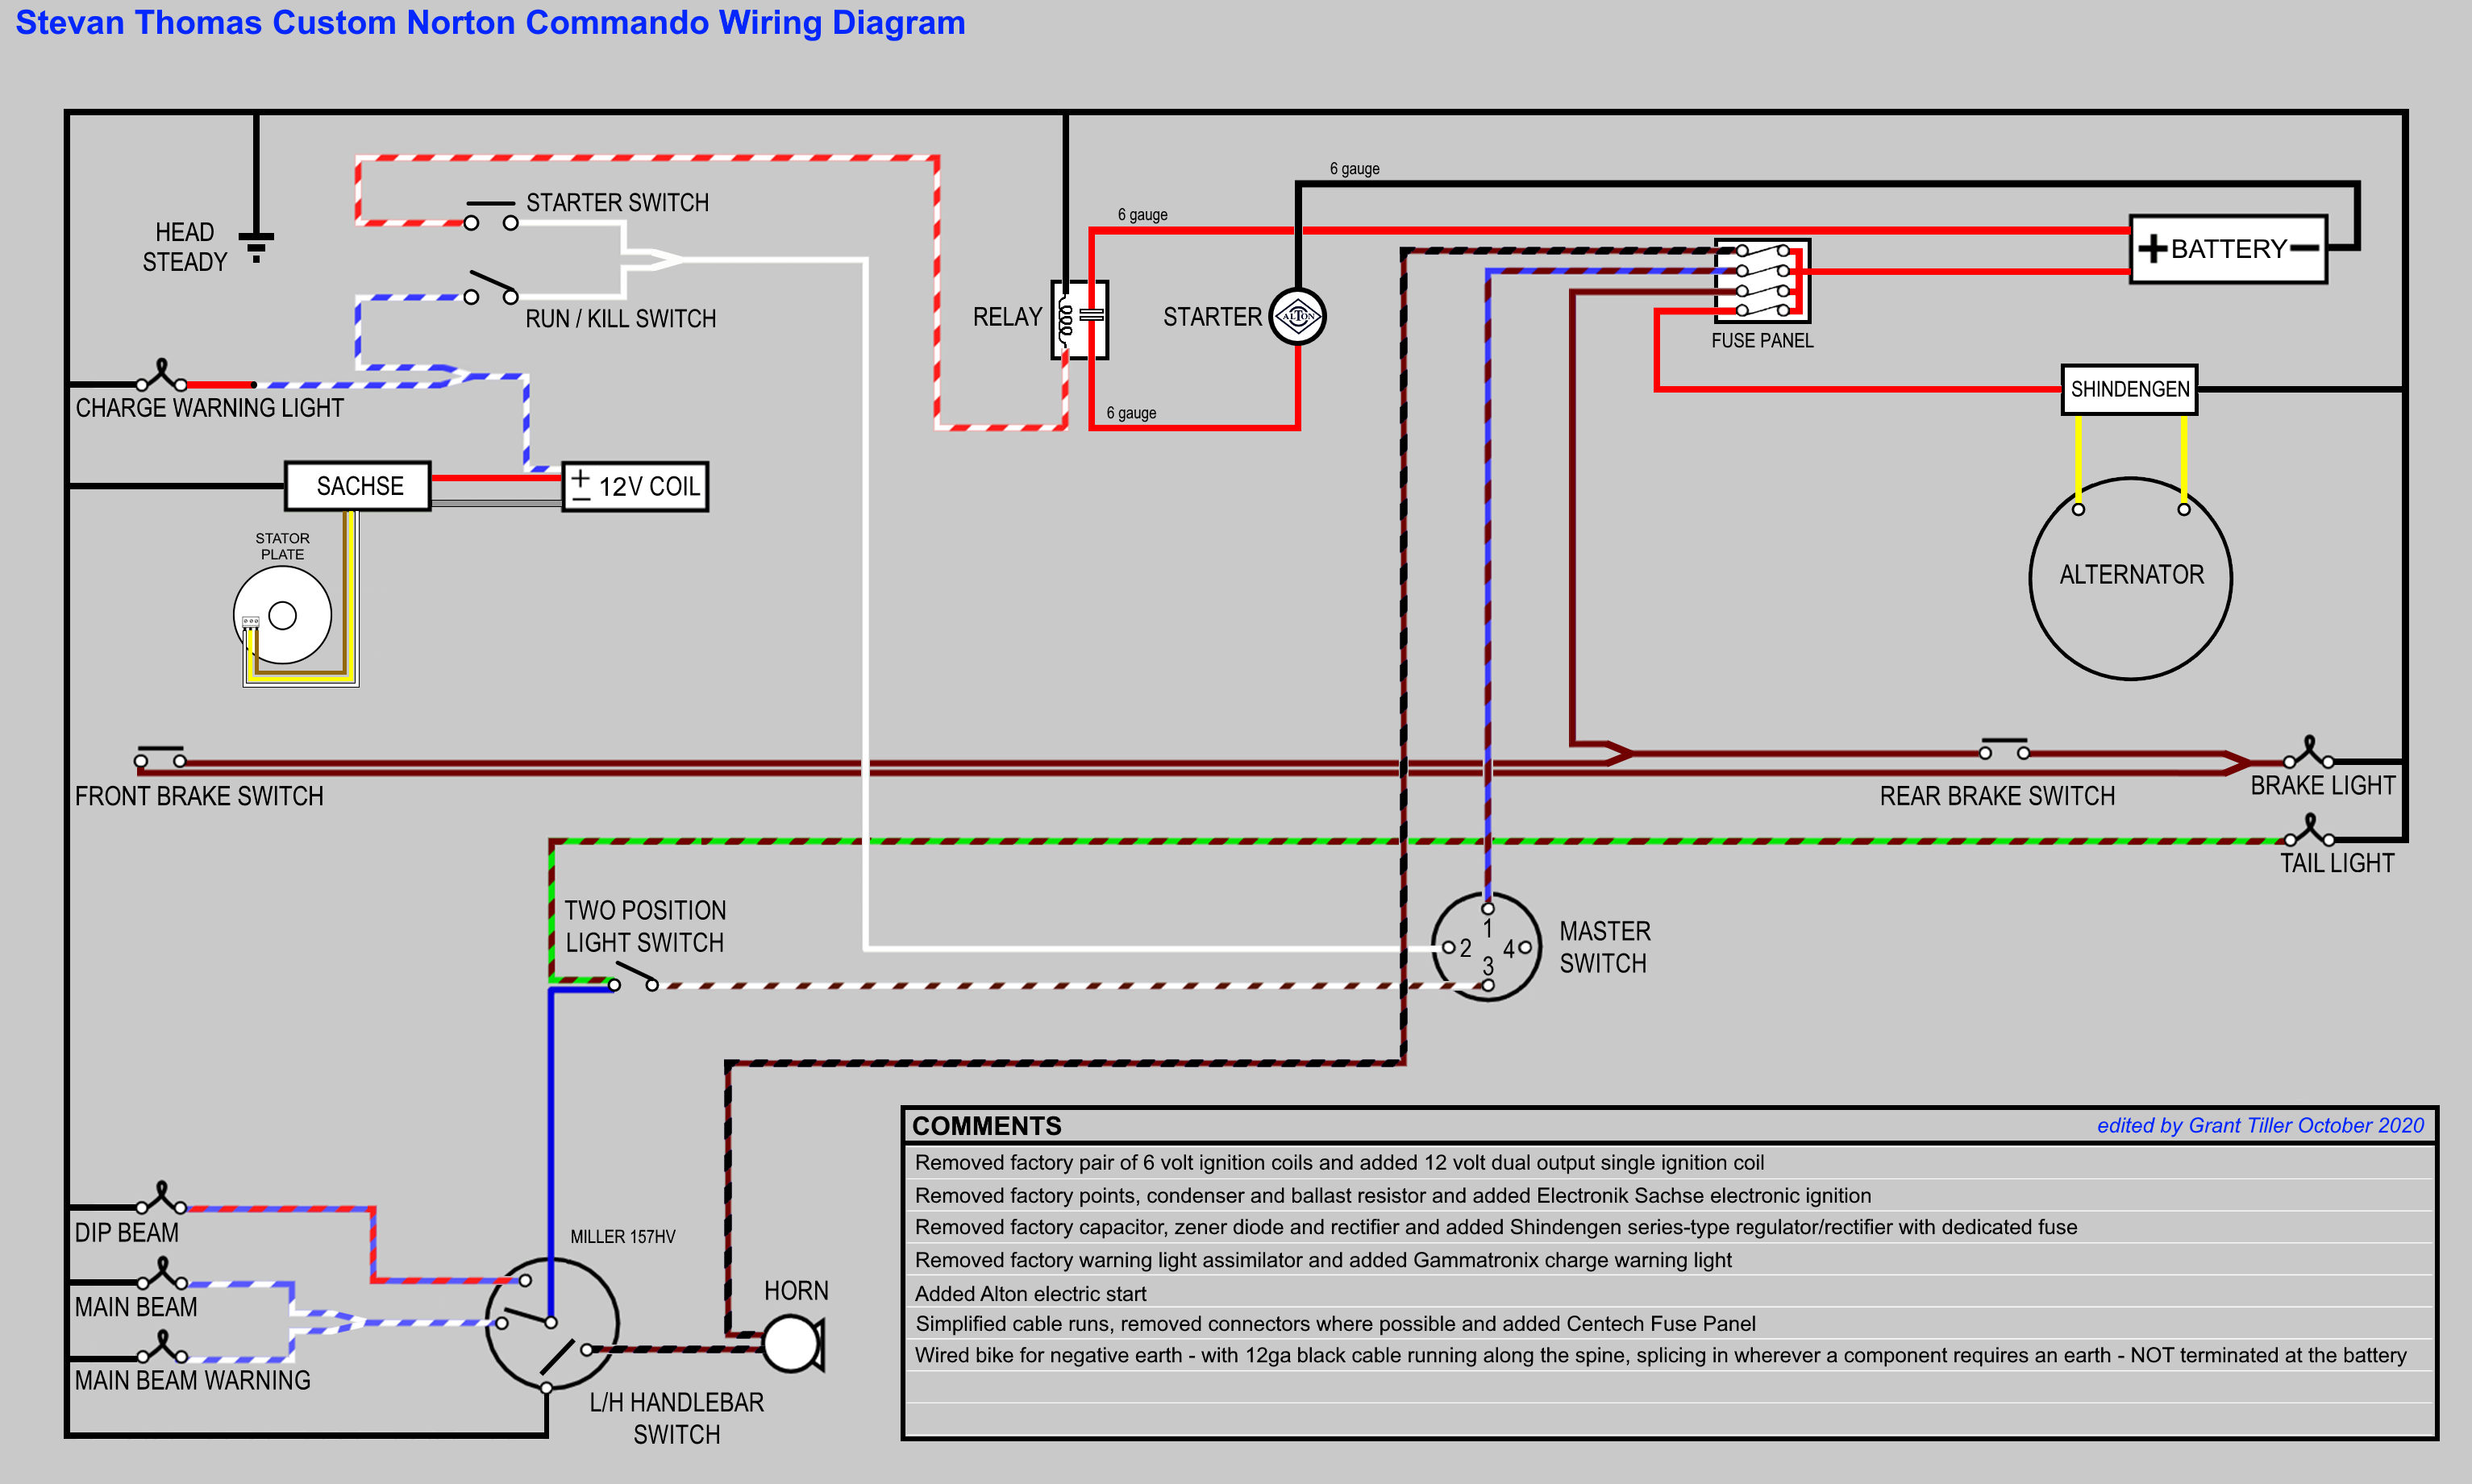
I was honoured when Stevan asked me to produce a wiring diagram for his bike – so I have quite a few hours invested into producing the World’s Best Wiring Diagram that is fitting for the World’s Straightest Commando.

Stevan’s Commando is not a trailer queen – it’s minimalist and stripped down to the bare essentials – setup for riding the twisties fast.
It’s styled along the street tracker lines and when you look closely, you will spot some neat modifications and tweaks geared up for speed and the rider. It’s pretty non-standard, so rivet counters should probably look away now!
Tom, the original builder, describes it as the “Son of P11”, and you can certainly see the likeness or family resemblance there.
Stevan is in the process of refreshing the electrical side of things on his bike, and has been collecting various components that he is in the process of fitting.
My goal was to come up with the best Wiring Diagram for this bike considering the electrical components already on the bike, plus the ones Stevan has already bought. I want to follow his ethos of simplicity and stripping it back to the essentials… needless to say, you will find no Interpol wiring here!!!
Negative
Stevan’s bike is wired negative earth, and one of the things i wanted to do was make sure that bad earths are never a problem.
I have stuck to the Norton/Lucas ethos in that respect, and am running a black earth wire from the headlight to the tailight, which can be tapped into whenever an earth is needed.
This was Norton’s idea too back in the day. The Commando has excellent earthing, with the exception of the turn signal lights, which relied on conductivity through the chromed plastic ‘stalks’. This is not an issue on Stevan’s bike, as he has no turn signals!
Battery Connection
Do notice that there is only one connection to the battery negative – this is the heavy 6 gauge cable that goes to the primary case for the Alton Electric start.
It is important not to take any other connection to the battery on this side, as if for any reason you have disconnected the heavy gauge cable (maybe you are doing some maintenance work on the primary), and you inadvertently touch the starter button, you can quite easily pull 200 amps of unfused power through the other cables in the wiring harness that are rated at 20 amps.
The wires simply melt!
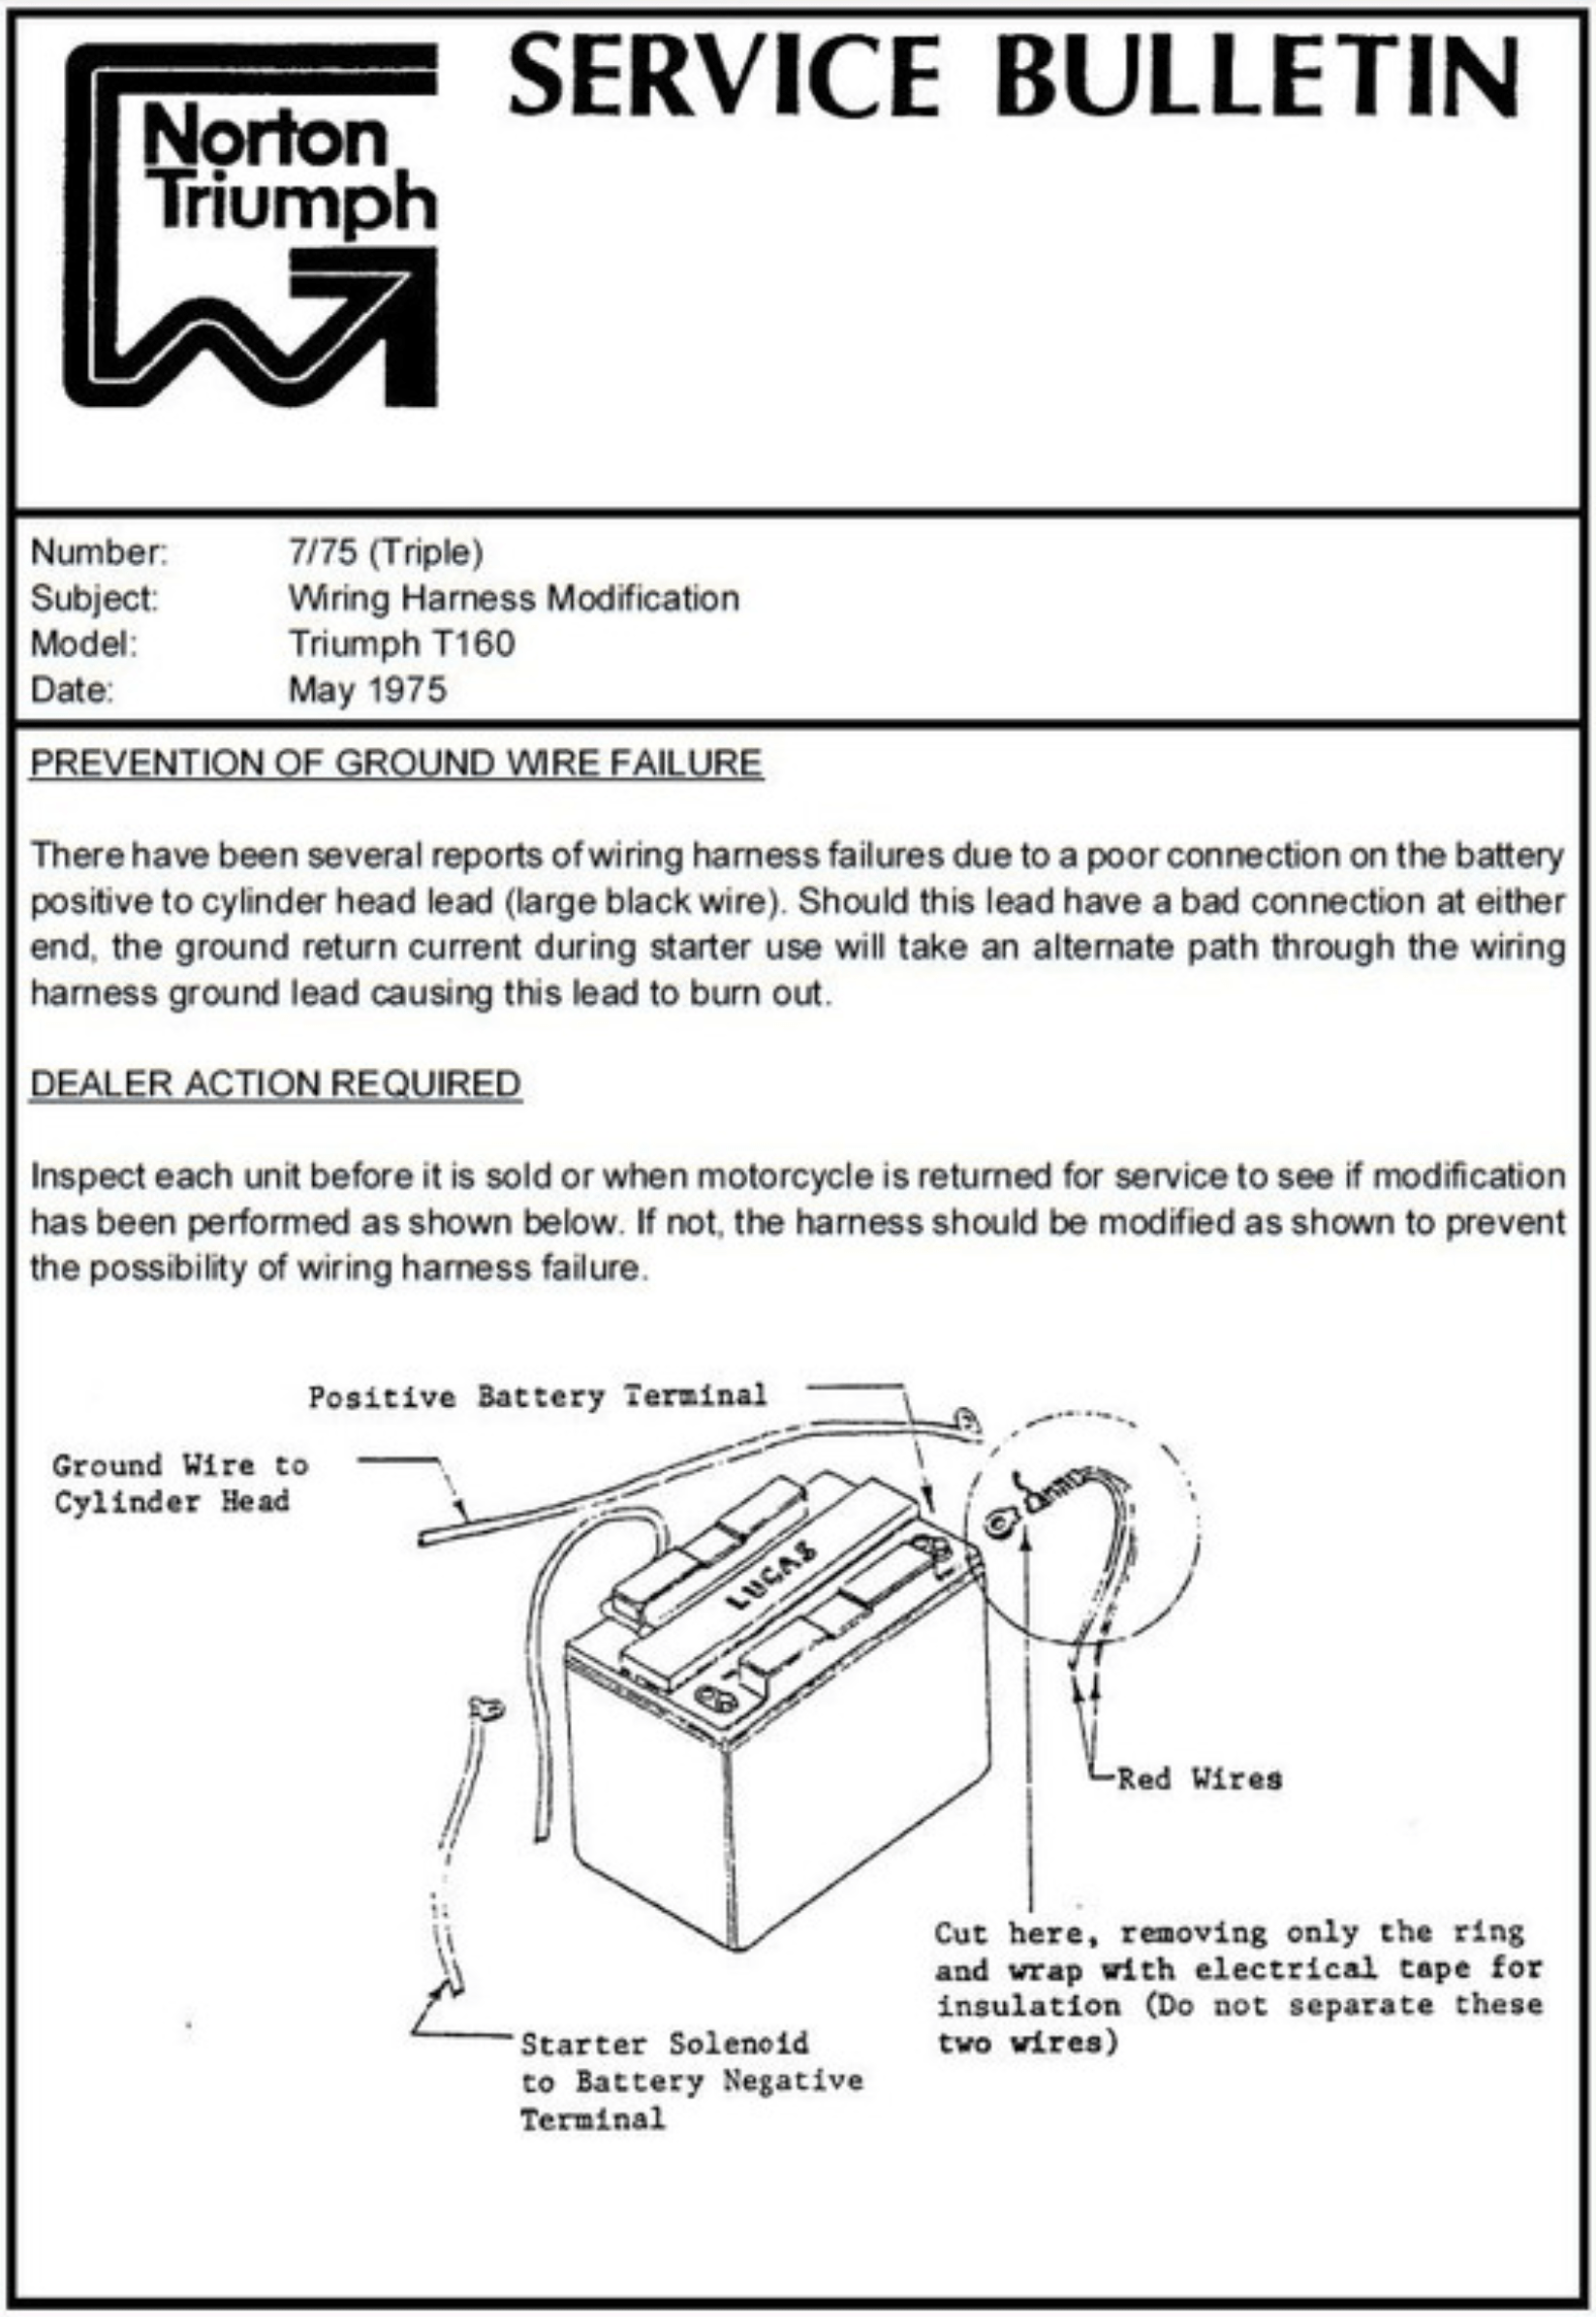
NVT had the same problem with the Triumph T160 back in the day.
They sent a Service Bulletin out to the dealers and distributors instructing them to cut the light guage wire from the battery, leaving only the heavy one. The same thing should be done on the MK3 Commando too (there are a lot of commonalities with the electrical system on the MK3 Commando and the T160 Triumph, as they were under the same ownership by that point)
All of the MK3 diagrams here on my site have that cable deleted for this very reason.
You often see MK3’s with this cable cut. I think it is common for a new owner of a bike to wrongly reinstate this wire when they open the side cover for the first time and discover that the wire has been cut. Wrong – it’s been cut for a very good reason!!!
So the correct routing for the earth is:
- A single 6 gauge cable from the battery to the primary case (or crankcase on the MK3)
- A connection at the head steady into the rest of the wiring harness (I like 12 gauge for this)

It is important to make the ‘head steady’ connection on the engine side of the head steady… Isolastics are a good electrical insulator as well as a good vibration isolator!
Don’t forget, we have no need to earth the frame on these bikes.
Fuses
Stevan has got a Centech AP-1 Fuse Panel on his bike.

This panel allows you to sub-divide your electrical system into separate circuits, which can be individually protected with their own fuses.
It also gives you a negative distribution block, which we won’t be utilising in the interest of keeping everything clutter free.
You can find the Installation Manual for the Centech AP-1 here:

Electronic Ignition

Stevan has chosen the excellent Elektronik Sachse ignition for his bike.
These are superb quality German made units.

They have a seperate ‘brain box’ which can be stowed away from the heat of the engine.
It’s in a well made aluminium heatsink, so is robust and made to wick any heat away from the electronics inside.

The stator and rotor are simple in design and manufacture, and the stator contains integrated strain relief for the cabling.
I really like the fact that Elektronik Sachse sell every part of the kit as a spare part.
You can find the Installation Manual for the Elektronik Sachse ignition unit here:
Charging
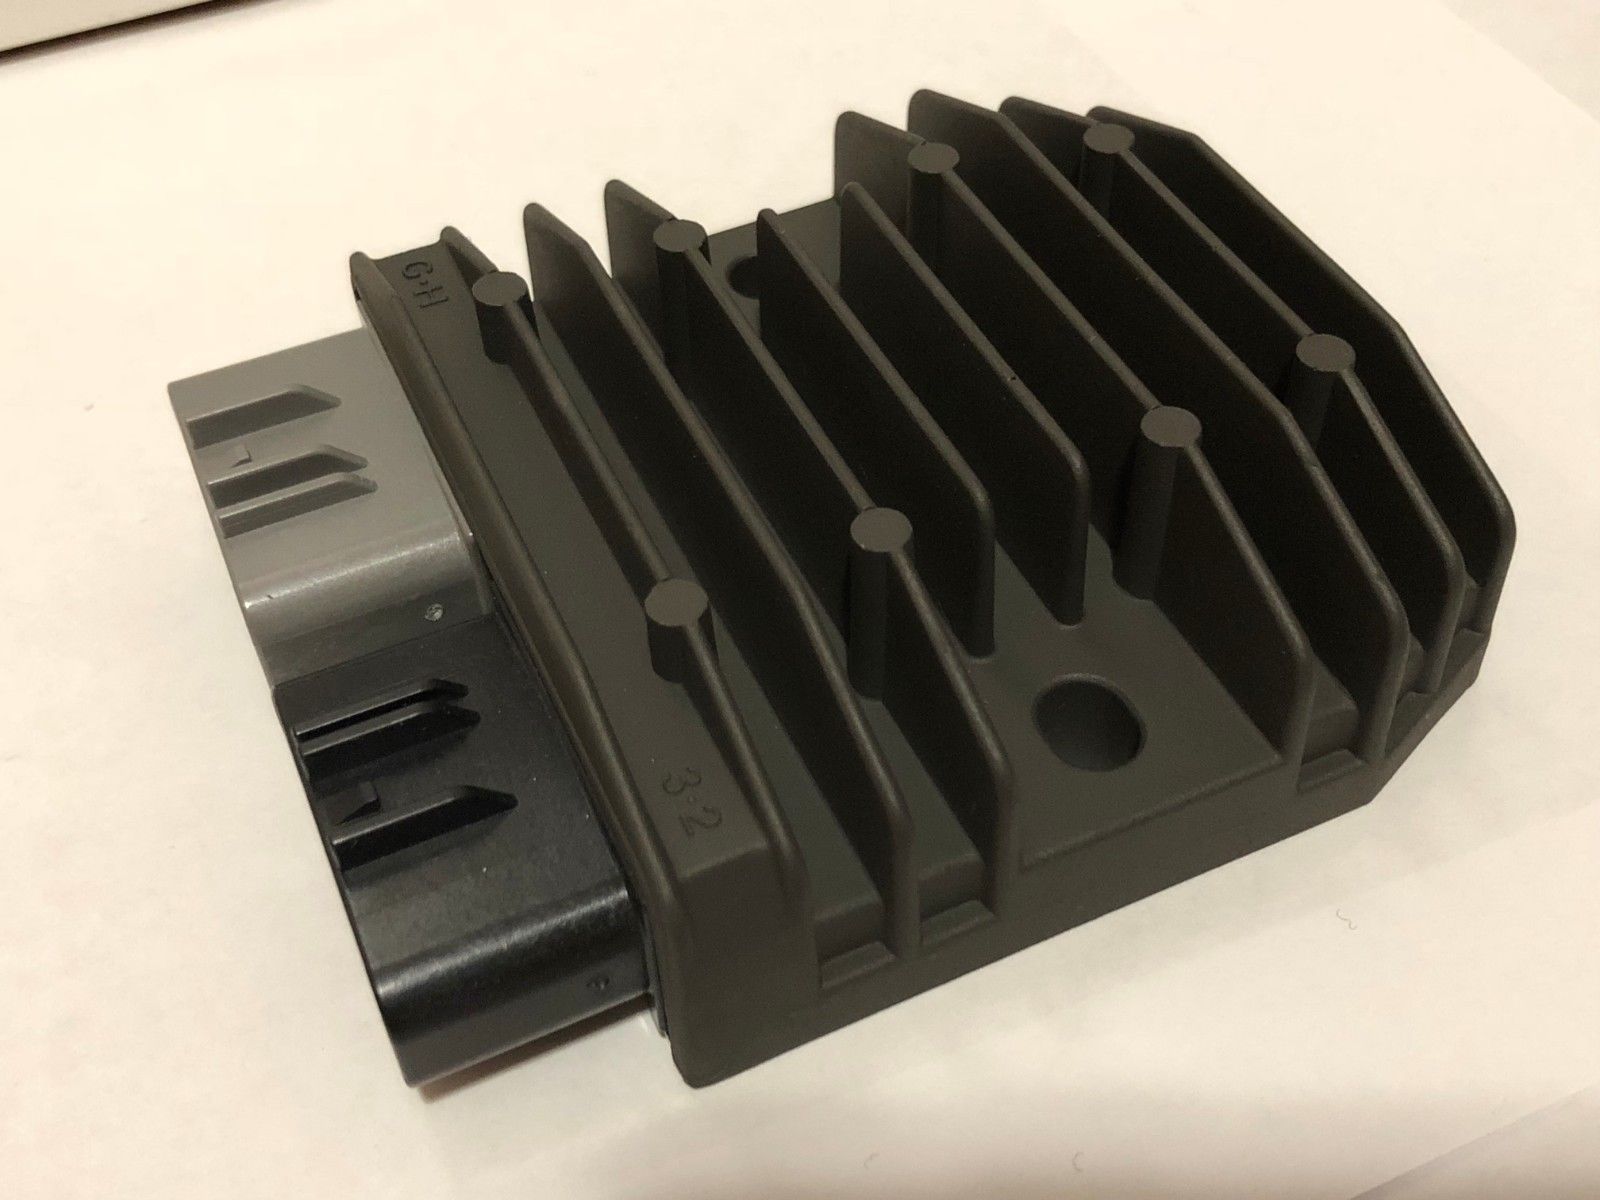
Based on my recommendation, Stevan has gone for the Shindengen SH775 regulator/rectifier.
This is a series-type unit, so unlike the inferior short-type technology, this takes the load off the alternator stator when the battery is fully charged.
Short-type regulator/rectifiers dead short the stator when charge is not required, which I feel is a poor use of technology and is (in my opinion) the reason why we are seeing a lot more failed alternators during recent times.
Stevan also has an LED headlight on his bike, so is using considerably less power than a traditional light bulb, so this makes a series-type reg/rec a great choice!
Charging Warning Light
Stevan has thrown away the notoriously unreliable Lucas 3AW 3 wire ‘silver can’ assimilator.

Instead, he has chosen an LED battery status monitor from Gammatronix.

These great little units provide far more information about the state of the battery and the charging circuit than the factory Warning Light Assimilator.
The stock WLA essentially just tells you there is something coming out of the AC alternator, and nothing else. Plus they are very prone to failure.
You can read more information about the Gammatronix battery status monitor here:
You can read the installation instructions for the Gammatronix battery status monitor here:
Electric Start

As I mentioned briefly, Stevan is going to go for the Alton Electric Starter kit – which he hasn’t fitted yet.
These are superb quality, and well engineered.
They allow you to keep the triplex primary chain and the factory standard ‘ham can’ air filter.
They come with their own bespoke alternator stator and rotor as part of the kit. And while it is ‘only’ single phase, Stevan can easily fit it to the Shindengen SH775 regulator/rectifier – you just use any of two of the three AC inputs instead.
The Alton alternator puts out around 90 watts at ‘cruising speed’ which is plenty.
The Alton kit comes with a very well written installation guide, which you can access here:
There are lots of circuit diagrams in the installation guide, which hand hold you through adding the Electric Starter kit to you bike.
They even cover negative earth bikes, which is superb attention to detail from the Alton guys!

One point worthy of mention is a slight inconsitancy in two diagrams next to each other in the installation guide.
One diagram (above) illustrates the correct set up of a single heavy gauge earth cable going from the battery to the primary case.
The second diagram (below) shows the lighter gauge cable still present alongside the heavy one.
I have crossed this out in red, as I cannot emphasize enough the importance of removing it!

You should note that Alton recommend that you buy a specific Electric Start kit for negative earth.
Their starter motor is a permanent magnet type, so wiring it for negative earth would result in it spinning in the wrong direction.
You cannot simply swap from positive earth to negative earth with their kit like you can with the MK3 (Prestolite) motor or the Colorado Norton Works kit.
Switches
The only other thing worthy of note is the switches on Stevan’s bike.
He has a vintage Miller type 157HV dip switch, so he can toggle between a dipped beam and the main beam.

The Miller 157HV also includes a horn button, this earths to the handlebars, rather than the standard Commando handlebar switchgear which connects the horn to the ‘hot’ wire.
So the horn has been reconfigured to be permanently attached to the ‘hot’ side via it’s own dedicated fuse.
I have wired the Gammatronix battery status monitor into the run/kill switch (which is a latching push-on push-off type.
In addition to feeding the Elektronik Sachse ignition – you can use the LED to let you know when the switch is in the ‘on’ position.
Wiring Diagram
All in all, I am really pleased with how neat and simple looking this wiring diagram came out – hopefully it will provide Stevan with years of good service and reliability!
Custom Norton Commando Wiring Diagram – Stevan Thomas PNG 3066×1841